Formula for Classroom
Success Series Post #2: Modeling
Today we are continuing on in the Classroom Success Formula Series. I am excited to be sharing today one of my favorite teaching strategies – Modeling. It isn’t new, but perhaps I can share a few new ideas that you might can use. How many of us would rather watch a YouTube video of how to make chicken dumplings rather than reading the written directions? I know I certainly would. There are at least seven major learning styles, and while not everyone would prefer to see a video, the point is, working through a process to learn something is often much easier than just diving in head-first with no guidance. After all, how does that saying go? –Teaching is the one profession that creates all other professions.
1. Modeling is not the same as lecturing.
I’ve heard educational trainers say that lecturing is the worst way to teach, and you should never do it. I’ve also heard that a carefully crafted lecture is sometimes needed. I’m torn on the concept of lecturing. Personally, as a learner myself I struggle being attentive during lectures – unless they are very quick, show me what I need, and then I get to try it myself. I personally lean against an “old-fashioned” PowerPoint no matter how cute it is; I just think they are dry. However, I note that my classroom is fully of diverse learners, and to be as effective as possible, I must provide many different learning strategies and opportunities. I do believe, though, that a teacher’s job is not to impart knowledge but rather to insight discovery. ‘nough said.
2. “I do/we do/ya’ll do/you do” gradual release model of teaching.
In this model of teaching the student is active the entire time, where in a lecture, the student is largely copying notes or just watching the teacher talk for an entire period or a large part of the period. This isn’t a new strategy by any means, and I love it. It is pretty much what my classroom looks like every day. If you are new to this strategy, it goes something like this:
– “I do”: The teacher explains and demonstrates the skill while the students follow along, trying on their own or processing. Here sometimes I do use a PPT, anchor chart, Activ Flipchart, white board, video, or guided notes. I just depends on what skill I’m teaching.
– “We do”: In the “we do” stage, the teacher is again modeling, but the teacher engages the class. For example, if I am teaching paragraph writing, I will have already written one for the students in the “I do” phase. In this phase, I am asking for student volunteers to give me sentence starters, active verbs, or transitions. Faster learners often step up in this phase, and I think that’s a good way to let them lead.
– “Ya’ll do”: Common statistics in education are that you retain 10% of what you hear, 20% of what you read, 50% of what you do, 75% of what you discuss and 90% of what you teach. Here students are working on an activity with a partner or very small group. I like to give them something hands-on here or with movement, so they are talking about it and explaining it to each other. This is an excellent place to use task cards. Also, students who are too shy to speak out in class will be more likely to ask a friend or peer in a small group. The teacher monitors during this time taking notes for formative assessment.
– “You do”: Finally, this is the time where students must show they understand the skill on their own. How to pace this strategy for best results? Every period is different, and so is the depth of every skill we teach, but I have 90-minute blocks. So, I set up each step for about 15 minutes. What I love most about this strategy, is that anybody teaching anything can use this strategy successfully and reach every student in the class. Every teaching pack that I have available in my TpT store is designed this way. I had the privilege of meeting Sarah Wessling at a conference I presented at last fall, and she was just as inspiring and down-to-earth as I had hoped. See a video on the Teaching Channel of her explaining this process.
https://www.teachingchannel.org/videos/improving-teacher-practice#video-sidebar_tab_video-guide-tab
3. Build confidence and eliminate frustration.
I, personally, feel really uncomfortable cooking. I’m not horrible at it where I burn everything; I just don’t have that special touch. So the thought of trying to cook something new causes me anxiety. If I’ve seen someone do it, I feel a little better about trying it on my own. I think the same is true for students.
4. Modeling works for new concepts and even review.
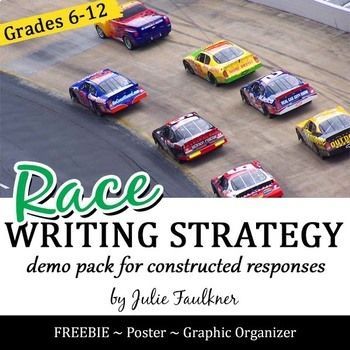
When I begin to teach writing, I use the RACE paragraph. RACE is an acronym for the formula I want students to use in my classroom when we write. I’ve seen variations of this formula, but I’ve tweaked this one specifically to help students formulate short, entire constructed responses and branch out to larger pieces of writing. In my mind, it is a simple formula – to my students, it’s foreign. I once just wrote the formula on the board, gave a prompt, and said, “Go.” The students tried, but what they produced was not on point. Then I was frustrated, and so were they. Now, I just go ahead and stick to my trusty modeling technique to ensure all students are comfortable before we proceed. I understand sometimes letting them take off flying on their own can work, but mostly I think they just leave the nest and fall to the ground.
5. Modeling also ties in with classroom management/routines.
I described my grouping snafu in the last post in this series. Again, though, it’s critical to model what we expect of students, even if we think it’s something simple. It prevents time being wasted, and we know how precious class time is.
Love this content?
Sign up for my email newsletter with more tips, ideas, success stories, and freebies!