Everything You Need to Know
About Planning a Yearbook Ladder
When it comes to creating a yearbook, one of the most important steps in planning is the sequence in which the content will appear, and in the yearbook world, we call that the yearbook ladder. The ladder is the page-by-page list of what will be appearing where in your yearbook. Without a ladder to plan your yearbook pages up front, it is likely that areas of content could be missed, pages would be left unplanned/blank, or your book won’t feel cohesive when it’s all said and done. However, the process of deciding how to tell the story of the year can be challenging because there are several things to decide and account for when planning a yearbook ladder. Here I’m sharing everything you need to know about planning a yearbook ladder so that process can go from challenging to rewarding in a few steps.
1. SET TOTAL PAGE COUNT FOR THE YEARBOOK
Before you can plan your yearbook ladder, you need to know how many pages your will book have. That is a matter of budget. Typically, you will meet with your yearbook representative from the company publishing your book as well as your school’s bookkeeper. Another thing to consider with your page count and budget is if you will be selling any ads: business advertisements and/or senior tribute advertisements. Those bring money into your account, but at the same time, they affect page count. Your yearbook rep and bookkeeper can help you make those decisions. You can click over to my Tips for New Yearbook Advisers post to read about planning the budget.
2. INVENTORY ENROLLMENT, CLUBS, SPORTS, AND ACADEMICS
In order to adequately begin positioning content on your yearbook ladder, you need to take inventory of some important data! How many students are enrolled, how many clubs, sports, and classes you have will affect the ladder because it determines how many pages you need for each of these pieces that you will want to cover in your yearbook. For example, if you have 300 seniors, you will need to figure out how many pictures you can (want to) put on the senior spread pages and then multiple that by how many total you will need to fit all your seniors’ portraits in the book. You’ll do the same for the underclassmen. The other content areas can be a little tricky depending on how you set up your timeline (more on that below) and depending on how much “attention” each one will get. With sports, for example, we decided to give each sport its own double page spread whether or not it was a “big” sport. We’ve done the same for academics and clubs in the past, but then decided to change that up for those coverage areas because of the lack of truly solid content. These are decisions you and your staff will need to make as early in the year as possible so your ladder is as solid from the get go. You can grab tons of planning guides in my Yearbook Adviser Starter Kit.
3. CHOOSE THE TIMELINE STYLE FOR THE YEARBOOK LADDER
The timeline you choose might be one of the most debatable aspects of planning your yearbook ladder. The timeline is the sequence in which the events and content will appear, and there are basically three options: traditional, chronological, blended.
Traditional: When I look through the old yearbooks from the 1930s, ’40s, ’50s, and so on stored in my classroom for how they are organized, I find a traditional layout with like content grouped in sections: student life, sports, academics, people, clubs/advertisements. There is no overlapping or merging of content among sections. This is a traditional timeline.
- Pros: If you have a traditional audience, they will like the familiarity of this sequence. Also, you aren’t confined to covering events on specific days of the year since you are just grouping content. Deadlines might be easier since you will have huge “chunks” of content done at one time. For example, if you have your advertisements done first in the year, that might be enough pages you make the first deadline. Read more about how to make your deadlines in my Everything You Need to Know about Meeting Deadlines post here.
- Cons: This sequence forces you to cover a topic on a spread that might not have very much material, or it could feel repetitive. For example, in the academics section, you might have several pages in a row with student seated at desks. Or, one sport might not have as many games or matches as another, so the pages don’t look balanced. Also, if something new pops up, it might be hard to find a place for it in you pre-determined sections.
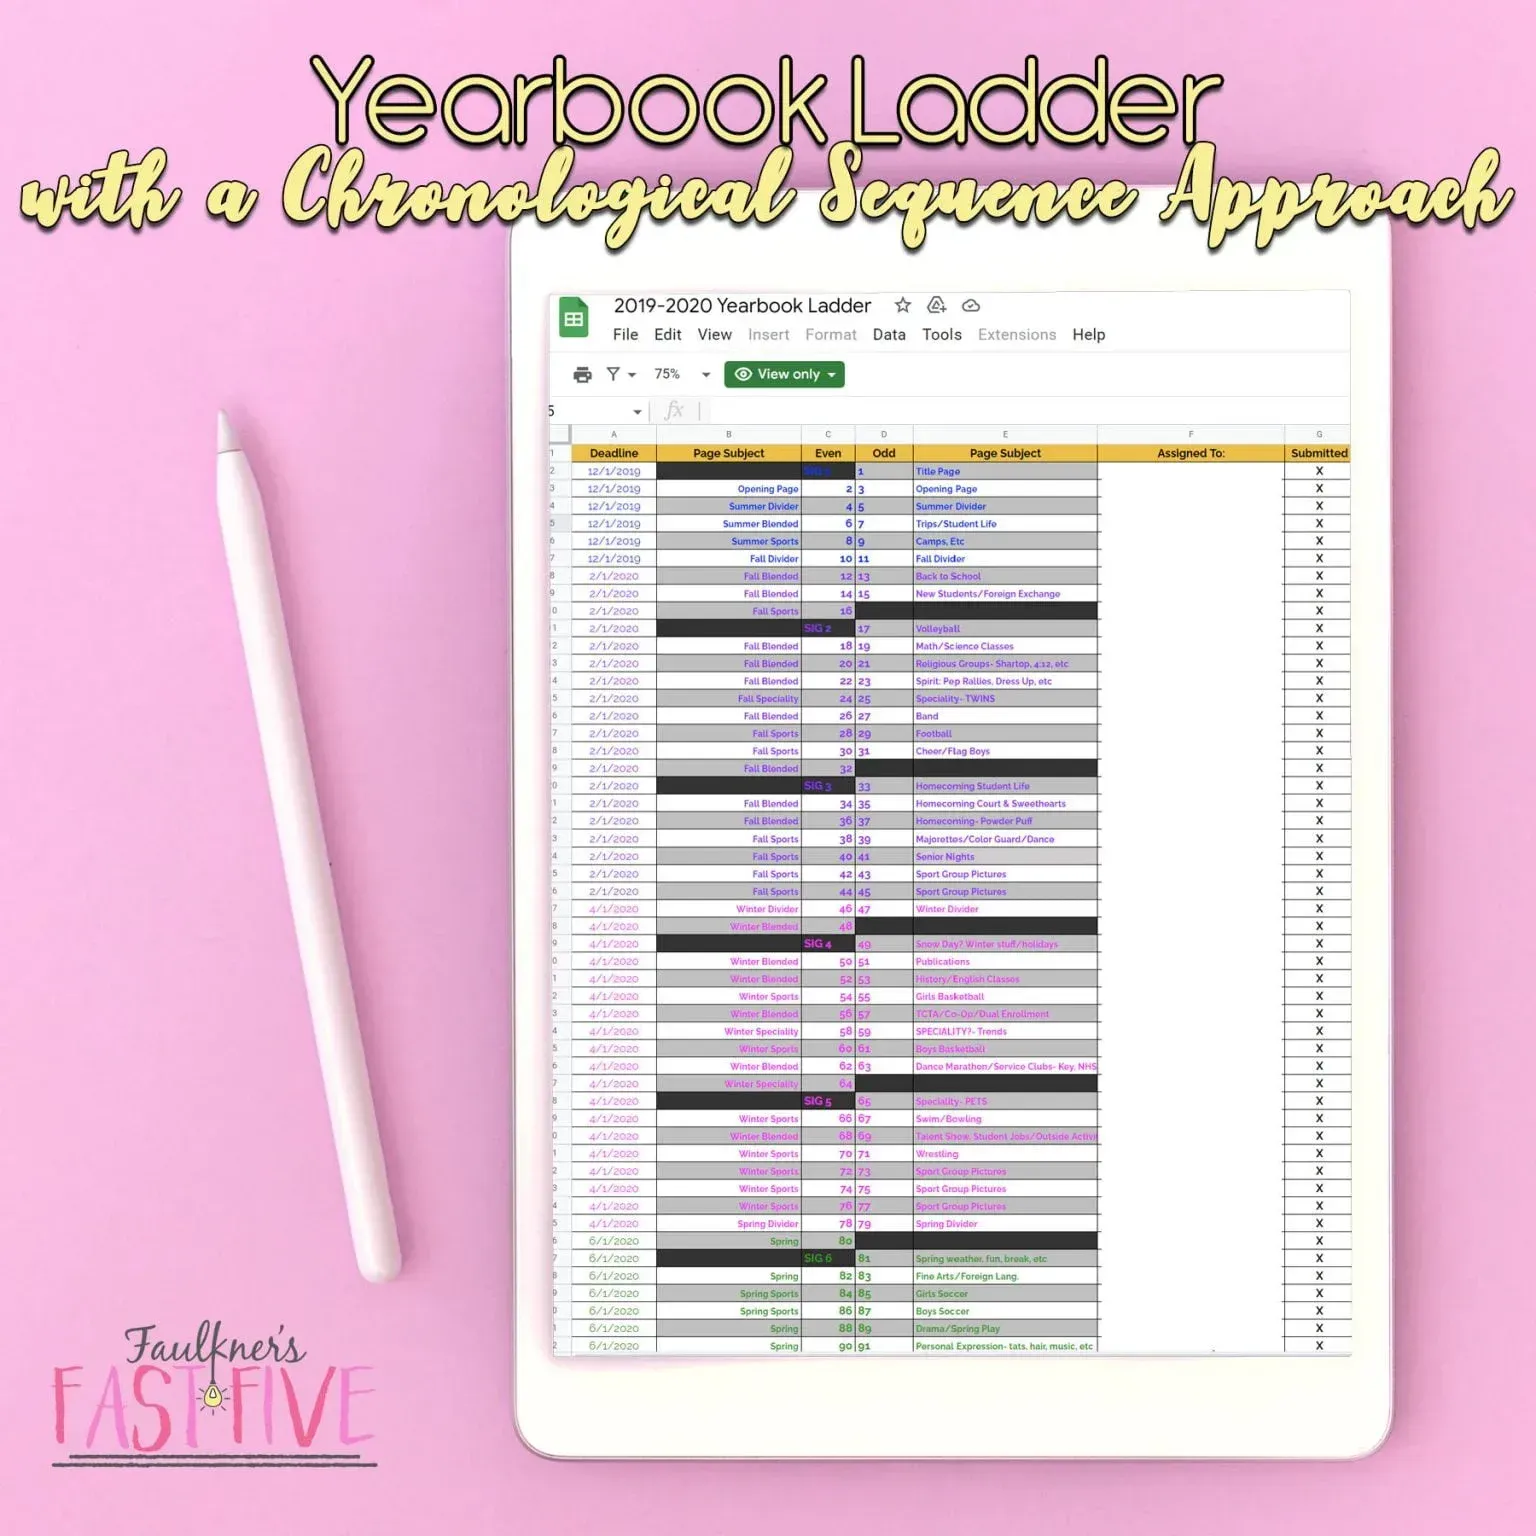
Chronological: As yearbooks have evolved, organic coverage by seasons, months, weeks, or days even has started to emerge. The chronological coverage approach organizes the book by events of the year as they happen.
- Pros: This approach showcases the way students live their lives: day-to-day. It is flexible in terms of coverage. Chronological coverage allows you to mix types of coverage on one spread. For example, you might cover a Beta Club community service event, a science experience in biology, and a football game that happen during a specific week all on the same spread.
- Cons: There is a lot of pressure to be organized with this method. Staffs cannot procrastinate because if a day or week goes by without any pictures being taken or notes being made, you can’t go back in time and get that coverage. Also, since coverage is being mixed, it might be hard to measure/equalize coverage of all your groups, academics, etc. Last, it may be hard for readers to “locate” specific events or sports since they aren’t grouped.
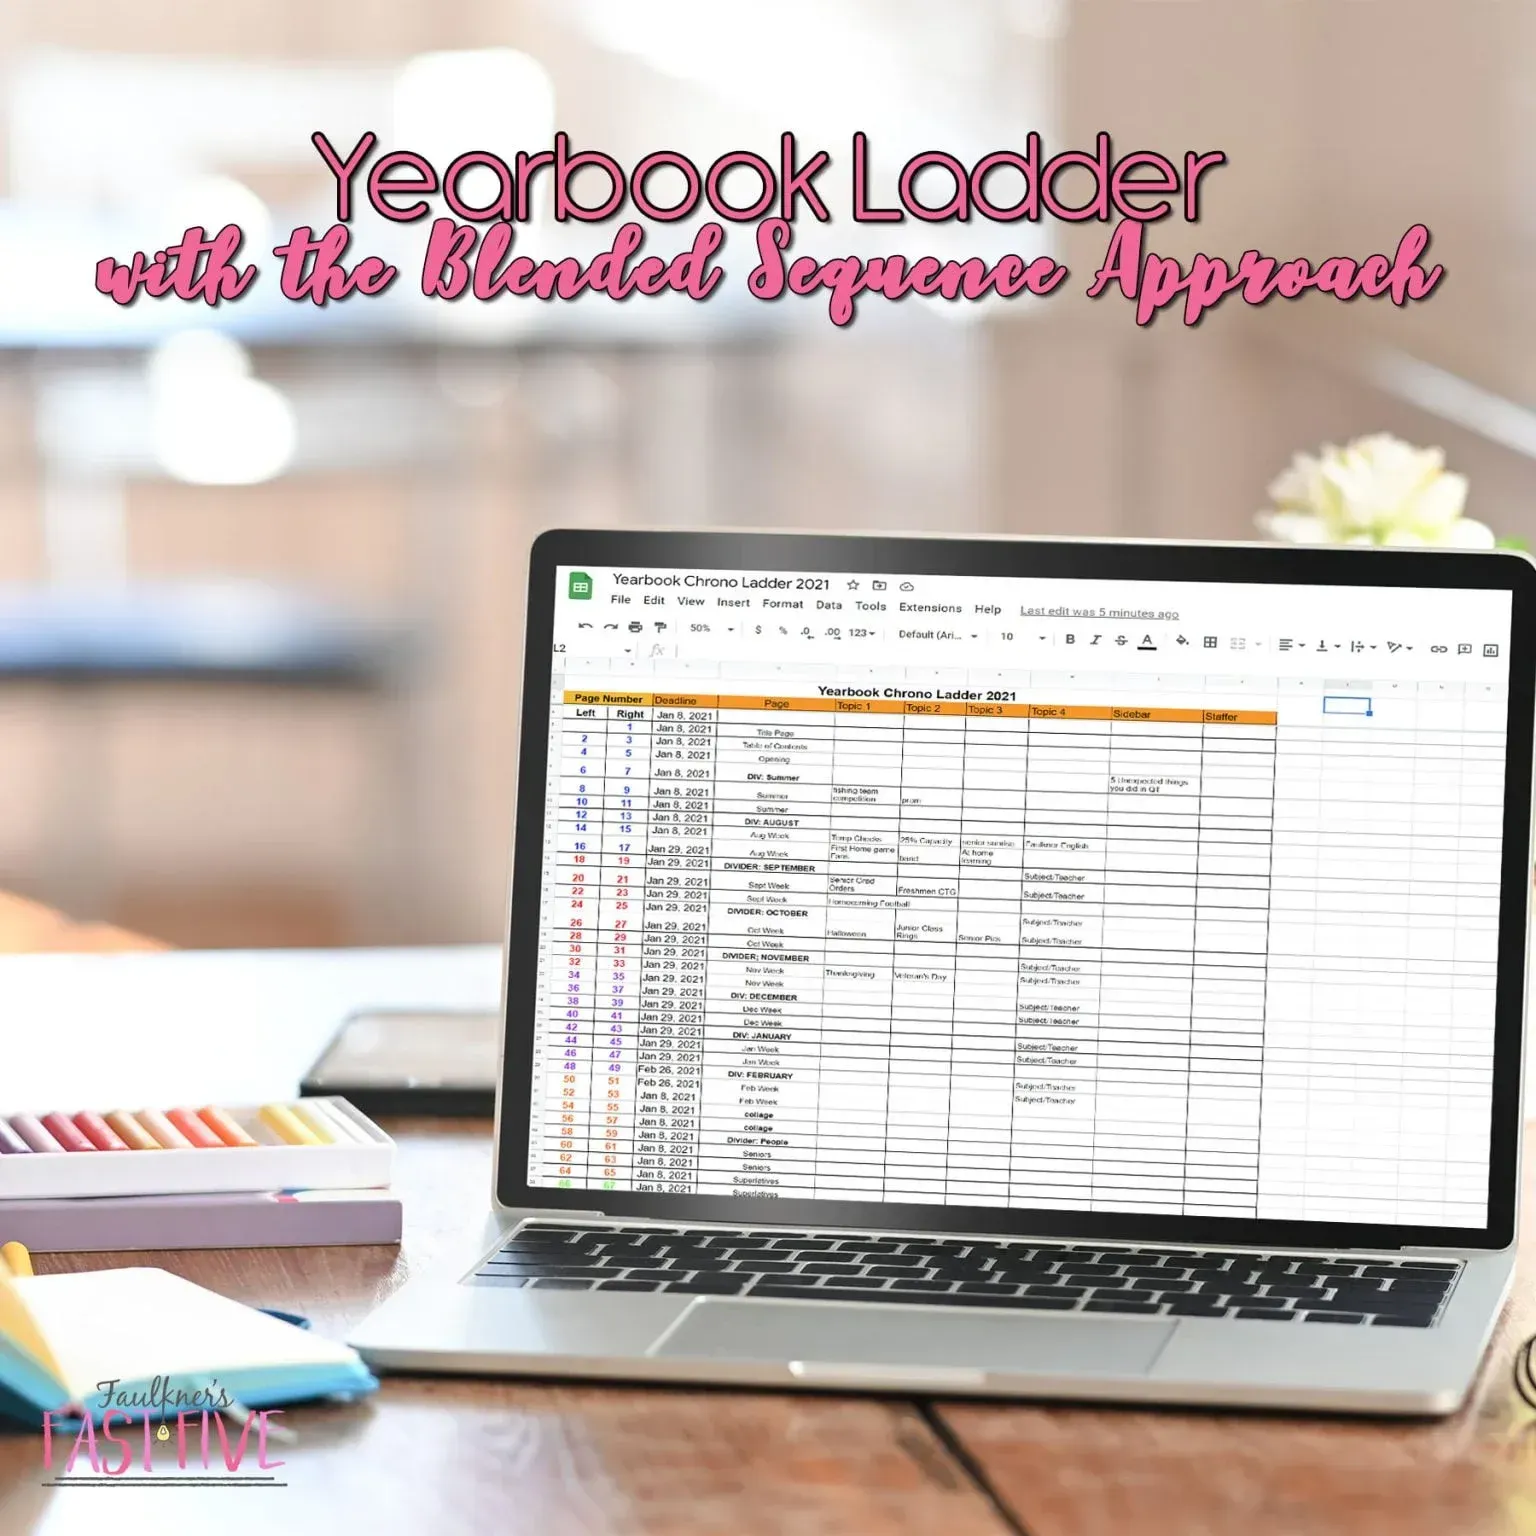
Blended: The first school year we came back-to-school from being closed due to COVID was 2021, and we still weren’t sure how much would be “normal,” so that ,of course, affected coverage and our ladder. We knew we would have to do something different. We decided a blended approach would work best in case we weren’t able to fill all the pages of our traditional sequence –looking back, we wouldn’t have been able to; things weren’t “normal” at all. The overall structure of a blended book is chronological, but we kept traditional sections throughout the book, too. For example, along with the month-by-month coverage to start the book and include academics, clubs, and student life, we did separate sports and people sections in chronological order. Last, we created a groups section that housed the sports groups and club groups, and our ads went in the back like always.
- Pros: This method is super flexible and “hides” issues like not enough content for whatever reason. This approach allows you to cover more topics in more creative ways. You can find topics for coverage that normally would never get any coverage. It’s the best of both worlds, in my opinion, to keep please a traditional audience but move toward something more modern as well!
- Cons: Similar to the cons of a chronological book, staffs have to plan early and be sure to catch stories for your monthly/seasonal sections, or when it’s gone, it’s gone.
4. INCLUDE DEADLINES WITH THE YEARBOOK LADDER
Whether we like it or not, deadlines rule yearbook. If we don’t submit the book on time, it doesn’t arrive on time! So, when you are planning a yearbook ladder, you need to consider when your deadlines will be. Check with your yearbook representative early, so you know how many pages are due when. Then, you can decide what you will put where so you and your staff can get the pages done on time! Consider also when events, sports, etc. occur in the year when placing them in your book as well. Additionally, you can used a well-crafted and planned ladder to mark pages that needed to be proofed and even for marking when pages are submitted. Whether it’s color-coding, marking, stickers, highlighting, etc., select a procedure that works for your staff and get the most out of your yearbook ladder!
5. SELECT A FORMAT FOR YOUR YEARBOOK LADDER
While it’s important to plan ahead to eliminate sudden changes, the yearbook ladder — like yearbook in general — is fluid. The planning stage alone is super fluid until it is somewhat pinned down, so a format where you can write and wipe and move things around is key. I’ve used wall posters, printed pages, and digital versions of my yearbook ladder throughout the years, and honestly, I feel like it takes all of them to keep everyone on track. If you are doing a printable version or wall version, then someone needs to be in charge of keeping it updated when there are changes made, especially if you are using two versions like a shared digital version and a wall version. I used Google Sheets for our digital version, and that makes it easy to share. There are several versions of a printable ladder in my yearbook starter kit that you can grab here. A fellow high school yearbook adviser from got creative and made an interactive ladder for her white board with magnetic write and wipe pieces. She bought magnets in business card size and dry erase business cards on Amazon. She put the magnet on the back and used washi to split it, so it represents a spread. Using a dry erase marker on her white board, she wrote page numbers, and then on the movable cards, she wrote the subject of the pages. She has the kids put a yellow check when they are ready for the editors to look at it, a red one when they have made the editors suggested corrections and they are ready for her to look at it, and then it will get a green one when it’s done. Whatever format you have, be sure it’s shareable and accessible to students. Students really should be involved in the process of planning the yearbook ladder, and they certainly need to be informed. That creates so much more ownership and an environment of collaboration.
“Before anything else, preparation is the key to success.” – Alexander Graham Bell
Definitely add planning your yearbook ladder to your to-do list for the first week of school, if not before. The priority is to choose the best plan to tell the amazing story of your school’s year and to showcase your students in the best light possible. Planning your yearbook ladder early on ensures that classroom success story!
Watch and listen to a version of this post here.
Love this content?
Sign up for my email newsletter with more tips, ideas, success stories, and freebies!


