Blog Layout

A Hands-On Approach for

Analyzing Model Papers & a Method

for the Analytics Summary

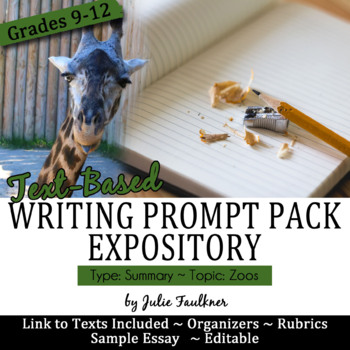
To prepare my students for the state writing exam they will take in February, I began developing materials to help them step through the process. They will actually write two text-based essays: an analytic summary and a compare/contrast essay. The analytic summary is straight from Common Core R.2 and W.2, and it is a completely new mode for our state. Here are the steps in the lesson I did with my students to introduce the analytic summary. 

Step #1 Define the Mode and Cover Vocabulary Words


Whether it is a familiar mode or not, it is important for students to know the premise behind the prompt. This enables them to understand the basis of the task and ultimately know how to shape their response to achieve the desired outcome. I even show them the standard(s) from which the mode is derived. Secondly, in this step, I provide the students with the vocabulary words and definitions so there are no barriers in understanding there. (I provide a list of those, as well as the explanation of this mode, in my Analytic Summary Teaching Pack on TPT). 

Step #2 Break Down the Prompt and Read the Stimulus


So students fully step into the simulation, I feel the steps must be authentic to the process they will encounter on the state exams. I found an interesting nonfiction article and created a prompt and some sample papers to go with it. I have the students read the prompt to themselves and circle all the action verbs/commands that it tells them they have to do. Then we number those, and ultimately they have a road map or checklist of what needs to be completed. This way they don’t leave anything out once they start the process on their own, and they know what it is asking them to do. I find that with this type of prompt, students tend to actually miss what the prompt says to do. Instead they get fixated on the issue raised in the stimulus. This step helps combat that issue. Next, we read the stimulus, as that is the first step that the prompt says to do. I provide students with highlighters, and they make specific notes about the article’s purpose and main points. We do spend a few minutes here summarizing (using the SWBST strategy) and discussing the article. While they can’t discuss anything during the state exams, I find it necessary to model how I want them to read the stimulus and for what information, so it’s still part of the learning process here.


Step #3 Red Light – Green Light 


In this step, students read the model papers. I knew I wanted students to categorize the model essays, so I had those ready to go. But as I looked out over the class, I saw a bunch of glassy-eyed teens. I do have to give them credit because they understood the importance of what we were doing and were really trying, but who wants to sit and grade papers all period, right?!? As if a light bulb flipped on, it hit me… Red Light Green Light. I hurried over to my cabinet and pulled out three colors of sticky notes. Thank goodness I had red, yellow, and green. Well, we pretended the pink was red! The activity is really simple: Students read the three papers and had to categorize them. That’s where the sticky notes, hands-on activity came in. The students placed the sticky notes on the essays according to the following directions:


Red Sticky = Completely off-topic (Stop and Start Over)
 
Yellow Sticky = Just a summary (Slow down and take another look)
 
Green Sticky = On topic addresses all requirements in the prompt (Good to Go!!)


Once they had the sample essays categorized, we voted on which one was which. Some students didn’t have them correct, so we discussed the correct answers. There are a couple of things that I love about this activity. First, it is hands-on, and that makes it better already! Secondly, students are actually getting to see three types of answers, and the ball is in their court to figure out which is which. It’s a good, productive struggle. 


Step #4 Comparing and Contrasting the Yellow and Green Essays


In this step, I provided students with a Venn diagram and their job was to analyze the yellow and green essays to determine what qualities they each possess that landed them in that category. I encouraged students to lists strengths and struggles of each essay. Students worked with one partner to complete this portion of the lesson, which fosters healthy discussion and sharing of ideas. (I love listening in on their conversations when they are talking about writing! Nerdy, huh?) Then I took suggestions from them and wrote those answers on the board. 

Step #5 Scoring the Essays


It’s not a secret that students will be given a grade for the essays they write for the state exams. In this step I have a copy of the state rubric, and students give the two essays a score. This is a crucial step so that actually know what must be included to achieve a passing score, and they have a solid example right in front of them. 


This lesson took me two 90 minute class periods with a class of honors juniors. I could definitely see it taking maybe a day longer to go even more in-depth with discussion. 


These steps and activities can be done for any mode and with any set of sample papers.  If your state is administering the Analytic Summary as part of your End of Course exam or if you are looking for a higher-level expository prompt, hop over to my store to get a full teaching pack that includes graphic organizers, and the sample prompt, and papers I used in this lesson! 


Love this content?

Sign up for my email newsletter with more tips, ideas, success stories, and freebies!


Old-Fashioned Test Prep That Works: A Proven Approach for Middle and High School English
By Julie Faulkner February 20, 2025
Let me let you in on a little secret: I actually like test prep season! I don't love that students have to take the tests (we can discuss that another day), but what I love is that this time is when we can slow down and reflect. There's no more pressure to teach new material, and it's also a signal that the end of the year is near! However, I know that means students are also super close to done and prepping for tests can really start to wear them thin. That’s why I stick to test prep strategies that work—no fluff, no gimmicks, just solid, old-fashioned review. While flashy new methods come and go, the classic approach still delivers results. By focusing on structured review, targeted practice, and immediate feedback, we can keep students engaged without burning them out. Here’s how to make test prep both effective and manageable.
Mastering Academic Feedback on Writing
By Julie Faulkner January 2, 2025
Providing effective academic feedback on writing is one of the most impactful ways educators can support student growth. Research and experience consistently show that timely, meaningful feedback clarifies expectations and helps students develop critical skills for success in writing and beyond. Whether you’re following evaluation rubrics like TEAM or preparing students for AP Language standards or EOC writing tests, creating a system for giving and receiving feedback is essential. In this post, I’ll summarize five key strategies to make academic feedback a game-changer in your classroom.
Student-Centered Teaching Strategies: Engage Your Class Without the Stress
By Julie Faulkner November 27, 2024
There are those times when "teachering" just isn’t optimal. What do I mean by that? "Teachering," as defined by me, involves delivering new material, expecting students to produce immediate results, or spending the entire class in direct instruction when students are already overloaded or overstimulated. These times include—but are not limited to—the days before a break, the holiday season, the week of a full moon, half days, or even the day after Halloween. During these moments, the best approach is to shift the focus away from you and onto your students. Let them lead, apply what they’ve already learned, reflect on their progress, and take ownership of their work. This hands-off teaching strategy creates a structured yet low-stress classroom environment where students stay calm, focused, and productive.
Insights from a Student Teacher of High School English
July 25, 2024
It’s a unique situation for both parties of a student-teaching experience: on the one hand from the point of view of the student teacher, you are entering someone else’s classroom and you may be teaching solo for the first time, and on the other hand, you may be the classroom teacher who is welcoming someone else into your classroom to take the lead. To say the least, this is a tricky space to navigate. That’s why I thought it would be interesting to speak directly to a student teacher – to hear her thoughts and experiences. Whether you are a cooperating/mentoring teacher of a student teacher or you are a student teacher heading into the classroom, this interview with a student teacher of high school English (Miss M), who just completed her placement, is very enlightening.
Everything You Need to Know About How to Sell the Yearbook
July 25, 2024
You’ve worked hard for half a year or longer to create this beautiful time capsule — the yearbook. You’ve sold advertisements, taken pictures, written headlines and captions, and included as many students as possible. BUT — what if no one sees what you and your staffers have created? That may be a little hyperbolic, but it is super important to have a strategy in place not just for creating the yearbook but for selling it as well. Here’s everything you need to know about how to sell the yearbook!
Make Your Yearbook More Diverse & Inlcusive with These Easy Tips
July 25, 2024
Our yearbook staff’s motto is “Everybody’s Story. Everybody’s Book.” That means everyone! Not just the seniors, the athletes, the staffers and their friends, certain cliques – everybody. Why does that matter? For one, if we are creating a book for people to purchase, they need to be reflected in it; or they won’t purchase it. But the bigger, more important reason is simply that we are telling the story of a year, and without every person represented, considered, and included in the yearbook design, we haven’t done our job: We haven’t told the true story of the year at all if we let bias or favoritism creep in or if we get lazy with coverage and choices. The yearbook must be an accurate time capsule with reflections of each person’s interests, styles, talents, abilities, and backgrounds. Therefore, you can make your yearbook more diverse and inclusive with these easy steps! Tips for your yearbook pages and beyond.
Planning the First Week of Yearbook Class
July 25, 2024
You’ve just been assigned the yearbook, or last year didn’t go so well, and you want your first days plans to be solid, effective, and fun! Does this sound like you? I’ve been there. The first week of school is a whirlwind, but in yearbook class, the first week back to school is even more topsy turvy, to say the least. You might have looked through my Tips for New Advisers post or How to Have a Picture-Perfect Start to the Year posts for adviser-facing suggestions, and you feel good-to-go from that side of things. However, now it’s time to decide what to do when students are walking through the door — AKA planning the first week of yearbook class! When I think about what to do the first week of school in my yearbook class, I try to think of it like one my English classes in some ways, and in other ways, it is completely different! In this blog post, I’ll share my student-facing plans for the first week of yearbook class.
What the COVID-19 Pandemic Did Not Change About My Classroom
July 25, 2024
The 2020-2021 school year was the year of the unexpected, the year of changes, the year of disappointments, the year of frustrations, and certainly the year of loss. It goes down in my book as the hardest year of my teaching career — that includes the first year I taught in middle school, the first year I was a lead in an inclusion classroom, the year I taught while building a house, the first year I was the new yearbook adviser, and the year I taught while having multiple surgeries for some serious medical issues. And let’s not forget that I actually contracted COVID-19 THE. FIRST. DAY. BACK of teacher in-service. However, I didn’t quit. I did survive, and I’m going back. That said, I am choosing to look at the positive — shall we say, “COVID Positive” — Bad pun. Anyway, despite all change that occurred this year — schedules, classrooms, assignments, students, and more, there were a few things that I’m thankful that the COVID-19 pandemic did not change about my classroom.
5 Ways to Use Class Time After the Yearbook is Complete
July 25, 2024
The yearbook is complete, submitted, done. Now what? You have several months of school left, and you aren’t sure how to keep your students on task for the remaining days. Does this sound familiar? With spring delivery or even summer delivery books where students take yearbook/journalism as a class, it’s often difficult — and even daunting — to come up with creative and constructive ways to use that time. As we all know, doing nothing is not an option! In this blog post, I’ll share 5 ways to use class time after the yearbook is complete.
How to Re-Purpose Lesson Plans & Materials for Digital Classrooms
July 25, 2024
Whether you are teaching via full remote learning, on a hybrid schedule, or blending your in-person classes with virtual classrooms, you’ll need your lesson plans and materials ready for digital classrooms. The good news is — you can re-purpose lesson plans and materials for digital classrooms without reinventing the wheel or making all new activities, worksheets, files, etc. In this blog post, I hope to share some hacks you can use to easily convert, edit, and share what you have from your traditional classroom right into your digital classroom.
More Posts
Share by: